Contents
| 2010 Chevrolet Cobalt Chart | |
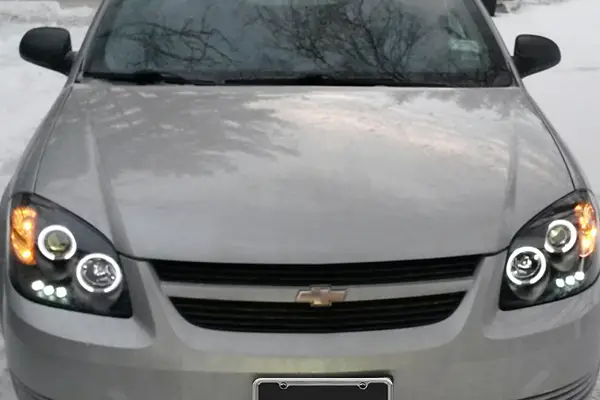
Headlight Bulb High Beam and Low Beam |
9007 |
Fog Light Bulb Front |
H11 LED |
Fog Light Bulb Front |
H16 LED |
Center High Mount Stop Light Bulb |
912 |
Brake Light Bulb |
3157R |
Turn Signal Light Bulb Front |
3457A |
License Plate Light Bulb |
194 |
License Plate Light Bulb |
7441 |
Parking Light Bulb |
3457A |
Tail Light Bulb |
3157R |
Turn Signal Light Bulb Rear |
3157 |
Back Up Reverse Light Bulb |
921 |
Side Marker Light Bulb Front |
194NA |
Side Marker Light Bulb Rear |
194NA |
Trunk or Cargo Area Light |
168 |
Trunk or Cargo Area Light |
917 |
Dome Light Bulb |
561 |
Map Light Bulb |
194 |
Map Light Bulb |
7441 |
Automatic Transmission Indicator Light Bulb |
37 |
Courtesy Light Bulb |
212-2 |
Turn Signal Indicator Light Bulb |
37 |
The compact Chevrolet Cobalt reached the auto market for the first time in 2004. By then, it was available as coupe and sedan versions. It also came with a variety of trim levels. The manufacturer resumed its only one generation in 2010. With an interior that’s isolated from external noises, this high-performance car guaranteed a high degree of comfort.
These unique features won the hearts of drivers. But just like anything else on this planet, the parts of this graceful vehicle wear out, and you have to replace them. If you don’t, prepare to forgo the reliability and comfort that your car guarantees.
Since that’s not the path that you would like to take, we have prepared this detailed Chevrolet Cobalt headlight bulb replacement guide to make your life easier. It provides generation information on these areas. But we recommend you also consult your dealers that cooperate with reputable manufacturers, such as Replace, Anzo, Spyder, and Spec-D on issues like your standard socket size. This way, you’ll be able to get the highest quality and reliability without breaking the bank.
Understanding that replacing headlight bulbs can be a daunting task for many, we have compiled a comprehensive Chevrolet Cobalt headlight bulb replacement guide to simplify the process. This guide offers detailed information specific to various generations of the Chevrolet Cobalt, ensuring that you have access to accurate and relevant information for your particular vehicle model. It covers essential areas such as bulb types, sizes, and installation procedures, making it a valuable resource for both novice and experienced car owners.
Chevrolet Cobalt headlight bulb size chart
Do you want to learn how to replace your Cobalt’s headlight, turning signal, or parking light bulb? Find the exact Chevrolet Cobalt headlight bulb size that you need. If you don’t, chances are, you’ll waste a lot of time figuring out what to do. Get the specs of the components as early as now. Whether you want to buy LED lamps, halogen lamps, HID headlight kits, Xenon headlight kits, fog lights, etc, you can resort to aftermarket light bulbs.
Aftermarket light bulbs: upgrades
You probably now know that your Cobalt came with the standard halogen bulbs that are less than impressive. So, as you plan to replace them, think about the nicer, aftermarket headlights that are readily available. If you choose to go for something more stylish in the aftermarket, consider the options that top industry manufacturers, like Spyder Auto and Spec-D Tuning, produce.
Another reason you should consider the aftermarket headlights is that most of them come with added valuable design features. You can expect to get accent LEDs, LED DRLs, CCFL/LED Halos, etc. Other than that, you find it easy to pick out a wide variety of designs, order, and plug-and-play install any of them.
Is it worth upgrading to LED headlights?
The answer to this question depends on a few factors. One factor to consider is the cost of upgrading to LED headlights. Another factor is how much you value having the latest and greatest technology in your vehicle. If you are someone who likes to have the latest and greatest technology, then upgrading to LED headlights may be worth it for you. However, if you are someone who is more concerned about affordability, then upgrading to LED headlights may not be worth it for you. Ultimately, whether or not upgrading to LED headlights is worth it will depend on your individual preferences and priorities.
Another factor that can affect whether or not it is worth upgrading to LED headlights is the cost of replacing them. LED headlights tend to be more expensive than traditional halogen headlights. However, they also last much longer than halogen headlights. So, if you are someone who is comfortable spending a little bit more upfront, then upgrading to LED headlights may save you money in the long run.
Ultimately, whether or not upgrading to LED headlights is worth it will depend on your own personal situation. If you are someone who values having the latest and greatest technology, then upgrading to LED headlights may be worth it for you. On the other hand, if you are someone who is more focused on affordability or longevity, then upgrading to LED headlights may not be worth it for you.
Which are brighter HID or LED?
HID lamps are brighter than LED ones. This is mainly because LEDs emit light in a single direction, whereas HIDs emit white light in all directions. They also lose brightness over time as the electrodes are oxidized, whereas an LED maintains its luminosity for longer periods of time. Despite these advantages for HIDs, many people favor LEDs because they are much more energy-efficient. For example, a small 15 W LED can illuminate as brightly as a 75 W HID lamp. Moreover, LEDs last longer and have lower operating temperatures than HIDs, making them the better choice for many applications. In conclusion, LEDs are brighter than HIDs for a variety of reasons.
Installation
1. Pull off the power plug
- Open the hood
- Lay down a towel (protect the painted surface of the front bumper)
- Pry up the retaining clip (Use a flathead screwdriver or your finger)
- Pull the clip straight forward (to remove the power connector)
2. Replace the old bulb
- Rotate the black plastic collar nut ¼ turn counterclockwise
- Rotate base of bulb ¼ turn counterclockwise (extract from the headlight assembly)
- Keep the halogen bulbs clean
- Use alcohol moistened towel or tissue to clean (if dirty)
- Insert the new low beam/ high beam bulb
- Rotate the bulb ¼ turn clockwise (lock in place)
3. Push power on the new lamp
- Insert back the black plastic retaining nut
- Rotate the nut ¼ turn clockwise
- Push the blue connector onto the new bulb (ensure it snaps into place)
- Rotate the socket ¼ turn counterclockwise
- Pull out the socket
4. Insert new turn signal bulb
- Push the old turn bulb straight out
- Push in a new one
- Rotate the socket ¼ turn clockwise
5. Install the Front Side Marker bulb
- Turn socket ¼ turn counterclockwise (use a pair of needle-nose pliers)
- Pull the bulb straight out
- Insert a new bulb
- Rotate the socket ¼ turn clockwise (use nose pliers)
6. Test lights and finish
- Turn on the headlights
- Activate hazard signals
- Flash the high beams
- Re-install the headlight assembly
- Tighten the two bolts
- Record the bulb change
See Also
Selecting the Ideal Camper Size for Your Chevy Cobalt and Towing Tips
Why is Chevrolet Cobalt Shaking at Highway Speeds & How to Fix It?
How to Diagnose & Fix Bad Chevrolet Cobalt Coil Pack
See More
Chevrolet Cobalt headlight bulb Chevrolet Cobalt bulb size Chevrolet Cobalt bulb size chart

Consultant in the area of automotive lighting solutions. Previously working as a lighting sales manager for various light bulb brands, collected intensive expertise for effective vehicle lighting & signaling systems that are compliant with the UN regulatory requirements and standards in the United States and Canada.