
Contents
Nissan Altima Headlight Bulb Size Chart
| 2022 Nissan Altima Chart | |
Headlight Bulb High Beam and Low Beam |
LED |
Fog Light Bulb Front |
LED |
Headlight Bulb High Beam |
9005 |
Headlight Bulb Low Beam |
H11 |
Center High Mount Stop Light Bulb |
LED |
Brake Light Bulb |
7443R |
Turn Signal Light Bulb Front |
7444NA |
License Plate Light Bulb |
LED |
Parking Light Bulb |
LED |
Parking Light Bulb |
7444NA |
Daytime Running Light Bulb |
LED |
Daytime Running Light Bulb |
9005 |
Turn Signal Light Bulb Rear |
7440 |
Side Marker Light Bulb Front |
LED |
Side Marker Light Bulb Front |
2825 |
Side Marker Light Bulb Rear |
2825 |
Tail Light Bulb Inner |
2825R |
Tail Light Bulb Outer |
7443R |
Back Up Light Bulb |
921 |
Trunk or Cargo Area Light |
158 |
Dome Light Bulb |
DE3175 |
Interior Door Light Bulb |
194 |
The Nissan Altima is a mid-size car that has remained one of the best-selling cars in North America. The Altima nameplate was introduced in 1992 and has undergone several refreshes over the years.
By 2015, the Nissan Altima had sold more than 3.6 million units in the U.S. since it was introduced in 2002. It’s a midsize 4-door sedan powered by a 2.5-liter L I4 engine that gives 182 hp.
Its great fuel economy and smooth handling are thanks to its continuously variable transmission (CVT). The nameplate is set to go out of production after the 2017 model year.
Like many modern cars, the Altima is equipped with headlight bulbs that are designed to last a long time. However, this does not mean they will not stop working eventually.
The notable fuel efficiency and smooth handling of the Altima owe much to its continuously variable transmission (CVT), a feature that underscores its modern engineering and design. This technology allows for seamless acceleration and contributes significantly to the car’s overall performance and driving experience. Despite its popularity and impressive features, the Altima’s production was scheduled to cease after the 2017 model year, marking the end of an era for this well-regarded nameplate.
Headlight Bulbs By Year
]2002 2003 2004 2005 2006 2007 2008 2009 2010 2011 2012 2013 2014 2015 2016 2017 2018 2019 2020Headlight Bulb High Beam - 9005 Looking for a brighter, longer-lasting headlight bulb? Fahren's 9005 LED headlight bulbs are the perfect upgrade for your car. These bulbs provide 3 times the light of a standard halogen bulb. The whole aviation aluminum body and unique hollow-carved heat sink design keep your bulbs cool even under extended use, while the 12,000RPM turbo cool fan ensures a long lifespan of up to 50,000 hours. Key Features:
Check On Amazon
Why we picked it: Check On Amazon
Check On Amazon |
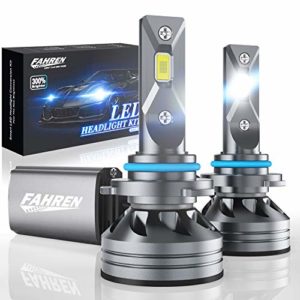 Fahren 9005/HB3 LED Headlight Bulbs, 60W 12000 Lumens Super Bright LED Headlights Conversion Kit 6500K Cool White IP68 Waterproof, Pack of 2
 Nilight 9005 LED Headlight Bulbs, 350% Brighter
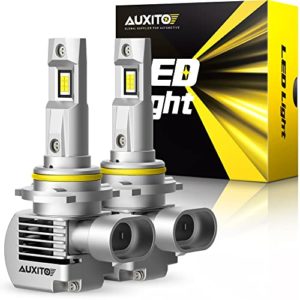 AUXITO Upgraded 9005 HB3 LED Headlight Bulbs 6000K White, 100W 20000 Lumens 600% Brighter
There are various reasons why a headlight bulb may be dim or stop working altogether, one of which could be that it has burned out. You can easily check if you have an issue by looking directly into the headlights while someone turns on your front lights for you.
If you notice that one of your headlights is dimmer than usual but the other is shining brightly, then it means that the lamp has burned out and needs to be replaced immediately.
If there’s some condensation in your headlight lenses, don’t drive with them like this because the moisture will eventually corrode your lights.
Get rid of the moisture in your headlights by removing them and placing them in a bowl with some rice. The dry rice can draw out any moisture that’s stuck inside of there, which will prevent further damage from being done to the lenses themselves.
There are also headlight bulbs specifically designed for Altima models made before 2014.
Aftermarket manufacturers have developed car parts that are compatible with earlier variants of the car without requiring major modifications to be done on your part. Checking online is a great way to find replacement headlight bulbs for older Nissan Altima units.
If you still happen to own an Altima model made within or after 2013, it means you can simply buy OEM-standard headlight bulbs directly from Nissan.
If you’re not sure which generation your car belongs to, it’s best that you check out the official Nissan website for all the detailed information you need.
The following guide will show you how to replace headlight bulbs on an Altima unit made after 2013:
First and foremost, be sure to turn off your vehicle and apply the emergency brake before opening the hood. This should also be done even if you have a lift at home or work. Doing so will prevent unwanted accidents from occurring while you’re working under the hood of your car.
Before going underneath the cabin, disconnect both negative and positive battery cables, starting with the negative cable first then finishing with releasing the positive one. Next, use a flat head screwdriver to pop the hood’s release latch. This will allow you to easily lift the hood and access both headlight bulbs that need to be replaced in a few minutes’ time.
Once opening the hood, find the plastic covers which are covering the headlight bulbs then remove them all in order for you to begin working on your car’s lighting system. After removing these components, proceed in accessing the bolts that hold the headlight unit in place. You can do this by gently pulling out from its socket or by releasing its locking mechanism located at the bottom of each bulb assembly.
Afterward, carefully remove both old light bulbs from their respective sockets without damaging anything else within the cabin including wiring harnesses and fuses attached to electrical systems throughout your vehicle. Take note that you should not touch the glass part of either bulb as this can cause premature wear and tear, damaging your car’s lighting system even more. Also, do not try replacing headlight bulbs with an empty hand or you will run into trouble when trying to put it back in its proper position.
The company manufactures these components in-house, so they are created using the latest technology and materials available on the market.
However, it doesn’t mean aftermarket Altima headlights are not up to standard at all. There are many different types of headlight bulbs you could buy for your car that would be just as effective in projecting light onto the road ahead of you at night.
Most reputable automotive retailers sell a good selection of headlight bulb options for most makes and models out there today.
To ensure your new set of headlights work properly, be sure to regularly replace any faulty wiring or fuses behind your dashboard if needed.
You also need to regularly change your windshield wiper blades as well as air filter every month or so, as these parts can sometimes interfere with a car’s electrical systems.
With the right care and maintenance, your Altima will continue to have crystal-clear headlight bulbs that shine just as bright on the road as they did during your purchase of the vehicle.
By regularly changing out any faulty components, you’ll prevent dangerous accidents from taking place due to the low visibility of the dark roads ahead of you at night.
The high value that lies behind headlights is one of the reasons pushing some of the most significant automotive manufacturers into designing beautiful shapes and designs.
The more the light, the safer the drive. Design translates to efficiency and some of the best Nissan Altima light designs available today include DRL bars, projector headlights, and LED lights.
These are built to meet all tastes and preferences. They are also available with clear lenses, chrome, black or silver housings and come with the best lighting sources, including LED and halogen bulbs.
These boost safety and your Nissan Altima’s appearance.
You always need to be assured that your headlights are working just fine. Night driving accounts for a lot of road accidents.
As such, clear visibility is crucial. As your mechanic checks that all other systems in your Nissan Altima are working well, have your headlight bulbs checked as well.
In addition, install quality headlight bulbs that are not only bright but durable. Some of the best aftermarket Nissan Altima headlight bulbs come from reliable manufacturers such as Dorman, Oracle Lighting, Putco, Lumen, and Sylvania.
Installation
Even after changing the headlight bulb on your Nissan Altima, you may still be left with a dim or dull beam of light that doesn’t seem to provide clear visibility at night.
You can adjust the headlight beam by replacing another part of your Altima’s headlight assembly – the headlight adjustment knob.
Even if you don’t experience these problems, it’s not a bad idea to replace your headlights every year or so for maximum visibility and safety. And replacement is fairly easy – here are step-by-step instructions.
Tools needed:
Pliers, screwdriver, flat-head screwdriver
- Step 1 – Open Hood
Locate the hood release latch under the dashboard on the driver’s side of the car. Pull up on the latch and open the hood.
- Step 2 – Remove Cover Plates
Wearing a pair of work gloves, remove the cover plates that surround your Altima’s headlight assembly. There are four total: one directly above each light unit and one on either side.
They have large Phillips screws holding them in place. Use a screwdriver to remove these screws and set them aside. Once all of the covers are off, use a flat-head screwdriver as needed to pry out any remaining fasteners or bits still connected.
- Step 3 – Loosen Bulbs
Turn your Altima’s headlights on (you won’t be able to see anything yet) and pull back slightly on both headlight adjustment knobs; you should hear a click.
This means that you’ve successfully disengaged the locking mechanism on your Altima’s headlight assembly and can begin unscrewing the bulbs themselves. Turn each bulb counterclockwise and pull it straight out of its socket and discard both.
- Step 4 – Insert New Bulbs
Insert new headlight bulbs into their respective sockets, making sure they’re perfectly upright and secure before pushing them in all the way.
Tighten each bulb with a clockwise motion, then turn your headlights off and test to make sure they work (you’ll probably need someone to help you).
If they don’t come on or appear dim, repeat Step 3 above by removing both adjustment knobs again; this will unlock the headlight assembly so that you can tighten the new bulbs.
- Step 5 – Test Headlight Adjustment
Turn your headlights back on and check to see that you’re able to adjust them by turning the adjustment knobs.
If they still don’t seem to have a sharp enough beam of light, turn them off and pull each bulb out again; this time, use a pair of needle-nose pliers to give the headlight adjustment knob an extra quarter-turn clockwise for more focused light.
Reinsert headlight bulbs and test again until satisfied with the results. Replace cover plates if desired, then close hood of your Nissan Altima and store or carry away old headlight bulbs so that they’re not accidentally thrown away in error.
See Also:
Nissan Altima Won’t Start But Lights Come On? Possible Causes & Fixes
How to Bleed Your Nissan Altima Brakes
How To Prepare Nissan Altima for Winter?
See More
Nissan Altima headlight bulb Nissan Altima bulb size Nissan Altima bulb size chart
Related Cars
Honda Accord, Mazda Mazda6, Kia Optima, Toyota Camry, Subaru Legacy, Ford Fusion, Hyundai Sonata, Volkswagen Passat, Chevrolet Malibu, Buick Regal

Consultant in the area of automotive lighting solutions. Previously working as a lighting sales manager for various light bulb brands, collected intensive expertise for effective vehicle lighting & signaling systems that are compliant with the UN regulatory requirements and standards in the United States and Canada.
How do I turn low beam headlights on for nissan altima 2014 model?
Check out the high beam indicator light. This blue light comes on when the headlight high
beams are on and goes out when the low beams are selected. The high beam indicator light also comes on
when the passing signal is activated.